


Planning to tackle a driveway paving block project on your own in Peterborough, Huntingdon, or Corby? Look no further than Rose Building Supplies, your trusted local builders' merchant. We're here to guide you through the process with our comprehensive DIY guide and offer an extensive range of materials to make your project a success!
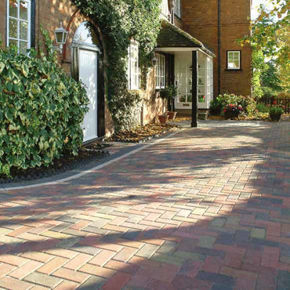
Your driveway is more than just a practical space for parking your car. It's the first thing visitors see when they arrive at your home, so why not make it a stunning welcome to your property? Laying driveway paving blocks is an achievable DIY project that can transform your driveway into an attractive and durable feature. In this step-by-step guide, we'll walk you through the process to help you create a beautiful entrance to your home.
Step 1: Planning and Preparation
Materials Needed:
- Driveway Paving Blocks and kerbs ( check our driveway paving block range )
- Wooden Pegs
- String Line
- Measuring Tape
- Spade
- Shovel
Instructions:
- Design Your Driveway: Before you start, consider the design of your driveway. Sketch out your ideas, decide on the block type, pattern, and any edging details.
- Calculate Materials: Measure the area where you want to lay the blocks. This will help you calculate how many blocks you need. Don't forget to add extra for cuts and replacements.
- Mark Out the Area: Use wooden pegs and a string line to mark out the boundaries of your driveway. This will be your guide when excavating.
Step 2: Safety and Precautions
Materials Needed:
- Safety Gear (Gloves, Safety Glasses)
- High-Visibility Vest (if working near a road)
Instructions:
- Safety First: Safety should always be a priority. Wear appropriate safety gear to protect yourself during the project. If your driveway is near a road, consider wearing a high-visibility vest to stay visible to passing traffic.
Step 3: Excavating the Area
Materials Needed:
- Spade
- Shovel ( check our shovel range)
- Wheelbarrow
- Skip Hire (for waste removal if necessary - you can use our Rose Skip hire service)
Instructions:
- Start Digging: Begin excavating the area following your markings. The depth of excavation will depend on the thickness of your paving blocks and any sub-base materials. It's typically around 150mm, but check the manufacturer's guidelines.
- Keep it Level: Ensure that the excavation is even and level. You can use a spirit level or a laser level for this.
- Prepare for Waste: Depending on the size of your project, you might generate a considerable amount of soil and debris. Consider skip hire for efficient waste removal.
Step 4: Preparing the Base
Materials Needed:
- MOT Type 1 Sub-Base
- Sharp Sand
- Wacker Plate or Compactor ( You can hire it from HSS)
- Spirit Level ( check our measurment tools range )
- Wooden Pegs
- String Line
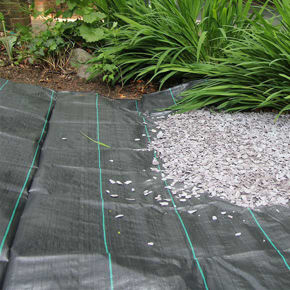
- Geotextile Membrane (optional but recommended - check our range of Geotextile membrane)
Instructions:
- Excavate the Area: Start by excavating the area where you plan to lay the blocks. The depth of your excavation should include the thickness of the paving blocks plus at least 50mm for a compacted sub-base.
- Lay Geotextile Membrane (Optional): To prevent weed growth and improve drainage, consider laying a geotextile membrane over the excavated area.
- Add MOT Type 1 Sub-Base: Spread a layer of MOT Type 1 sub-base material over the prepared area. This sub-base is essential for providing a sturdy foundation. Use a wacker plate or compactor to compact the sub-base evenly. Check for levelness using a spirit level. It's crucial that the sub-base is flat and level to avoid any unevenness in your finished driveway.
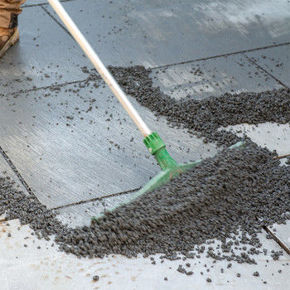
- Apply Sharp Sand Layer: After the sub-base, add a layer of sharp sand over the compacted area. This sand layer should be about 30-40mm deep. Rake and level the sand with a straight piece of timber to create a smooth, even surface.
- Establish Borders and Lines: Mark out the borders of your driveway with wooden pegs and a string line. This helps ensure your blocks are laid in straight lines and the correct pattern.
Step 5: Laying the Paving Blocks
Materials Needed:
- Paving Blocks
- Rubber Mallet
- String Line (for maintaining straight lines)
Instructions:
- Begin at a Fixed Point: It's usually best to start laying your blocks from a fixed point, like the edge of your house or a garden wall. This provides a straight reference point.
- Lay the Blocks: Place the first block at the starting point. Use a rubber mallet to gently tap it into position until it's level with the string line.
- Maintain the Pattern: Follow your chosen pattern. If your design involves different block sizes, make sure you follow the design closely to achieve the desired look.
- Use Cut Blocks: As you reach the edges orneed to fit blocks into specific spaces, you may need to cut some blocks to size. A block splitter or a saw can be used for this purpose.
- Keep it Level: Continuously check the level as you lay each block. Adjust the sand beneath the blocks as needed to maintain a consistent level.
- Fill the Gaps: As you progress, make sure to leave small gaps between the blocks to allow for jointing material (usually sand or fine gravel).
- Compact the Blocks: Once all the blocks are in place, use the wacker plate or compactor again to gently compact the blocks into the sand layer. This ensures they are secure and helps lock them in place.
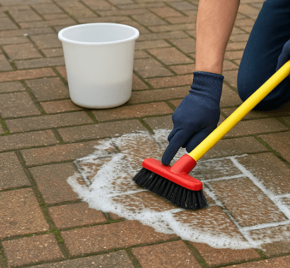
Step 6: Jointing and Finishing
Materials Needed:
- Jointing Sand
- Broom
- Garden Hose
Instructions:
- Apply Jointing Material: Fill the gaps between the blocks with jointing sand or gravel. Use a broom to sweep the material into the gaps. Make sure it's well distributed.
- Compact Again: Go over the surface with the wacker plate or compactor one more time to firmly secure the blocks and set the jointing material.
- Clean and Finish: Use a garden hose to lightly spray water over the driveway. This will help the jointing material set. Make sure there's no excess sand or gravel on the surface
Congratulations! You've successfully laid your driveway paving blocks, creating a beautiful and functional addition to your property. With proper care and maintenance, your new driveway will provide years of service and enhance your home's curb appeal.
Browse our selection of driveway paving blocks from our trusted Stonemarket supplier
We invite you to visit our Rose Building Supplies branches. With locations in Peterborough, Huntingdon and Corby, our branches offer a wide range of high-quality building supplies and materials for your projects. Our knowledgeable staff are ready to assist you in finding the perfect solutions for your needs. Or browse our stock online and conveniently place your order for pick-up from our branches or delivered to your door!
Rose building supplies - your local builders merchant


